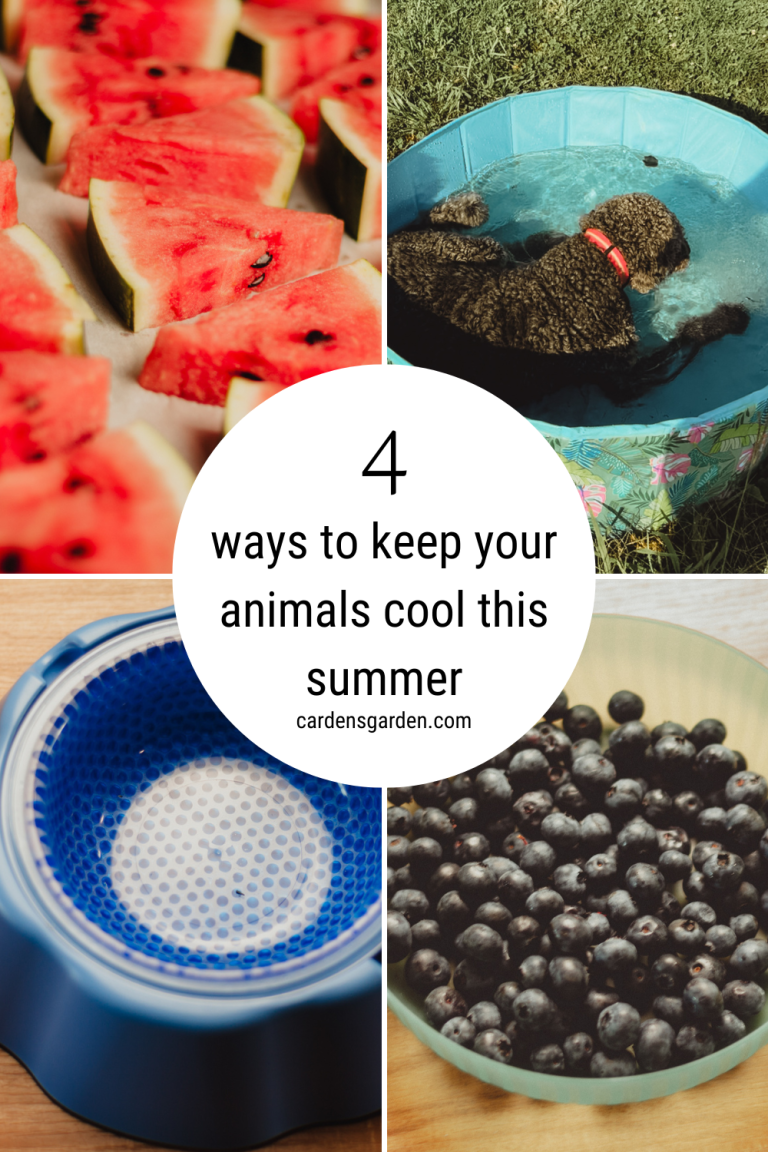
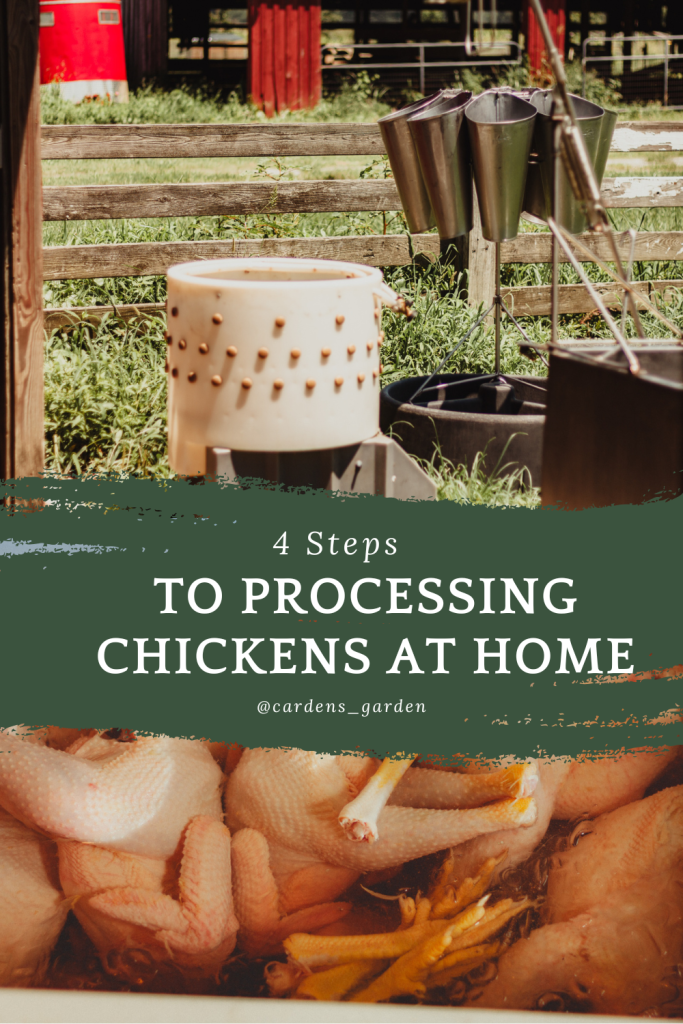
4 Basic Steps In Slaughtering Chicken
Chickens are the gateway drug to homesteading. They are such a great intro because they are fairly easy and dual purpose. Chickens can give eggs and meat to your family. Let’s talk about the 4 basic steps in slaughtering (or processing) chickens on your homestead.
Our very first taste of homesteading happened on 1/4 acre outside Sarasota Fl. Like the rest of the world, we decided to get egg laying chickens. We got 4 chicks from a local feed store. We kept them in our florida room until they were big enough to go outside because we didn’t have a garage or shed. Toward the end our entire house smelled like bird no matter what we would do. 0/10 I do not recommend.
Upon moving to the homestead we were anxious to get our first batch of chickens. But it was time to up our game. I mean, we didn’t move to 8 acres for 4 chickens. Since it was our first time getting birds here Nick convinced me to not get too carried away. We decided to start with 15 egg layers and 15 meat birds.
We were blessed enough to become friends with a local farm who actually brought Nick on to help with their chicken processing days when we first moved to NC.
While Nick had processed chickens with this farm, he hadn’t done all the steps himself before. I had never even gotten to go, so not only had I not done it, I really had no idea what I was getting myself into. Not much ruffles my feathers ( pun intended) but until you are in it, you don’t really know.
So here we go. I am going to give you the 4 basic steps to processing chickens and my real opinion of what it was like as a newbie.
The first question you might be asking is
How old are chickens when they are processed for meat?
This depends on a few factors.
The type of chicken. Is it a true meat bird or is it a dual purpose bird.
Some people choose to get dual purpose to use as egg layers and then only process birds once the chicken is old enough to stop laying eggs. Which isn’t really feasible if you are looking for ongoing sustainability of a continuous meat source for your family. If you are choosing a true broiler, or meat bird, such as Cornish Cross. Cornish Cross is arguably the most popular broiler choice. These particular birds it is recommended to butcher at no more than 10 weeks. Because they have been bred for this they go extremely quickly. After 10 weeks they can begin to have significant health issues including suffering from heart attacks, broken legs from being unable to carry their own weight and even eating themselves to death.
We went with White Chantecler chickens this time. If I am being honest, only because they were sold out of the cornish cross. We raised this birds to be 15 weeks old and they were still quite small. The taste was great but I think we will go with the traditional cornish cross next time. They are both a less expensive polt and are more efficient as a meat bird.
Let’s assume you’ve gotten your birds. You have raised them from brooder to chicken tractor and you are ready to process. The next thing you might be wondering is
Where do I get chicken processing equipment?
Before I get into that let’s go over what the main components of chicken processing equipment are.
- Cones
- Scalding Tank
- Plucking Machine
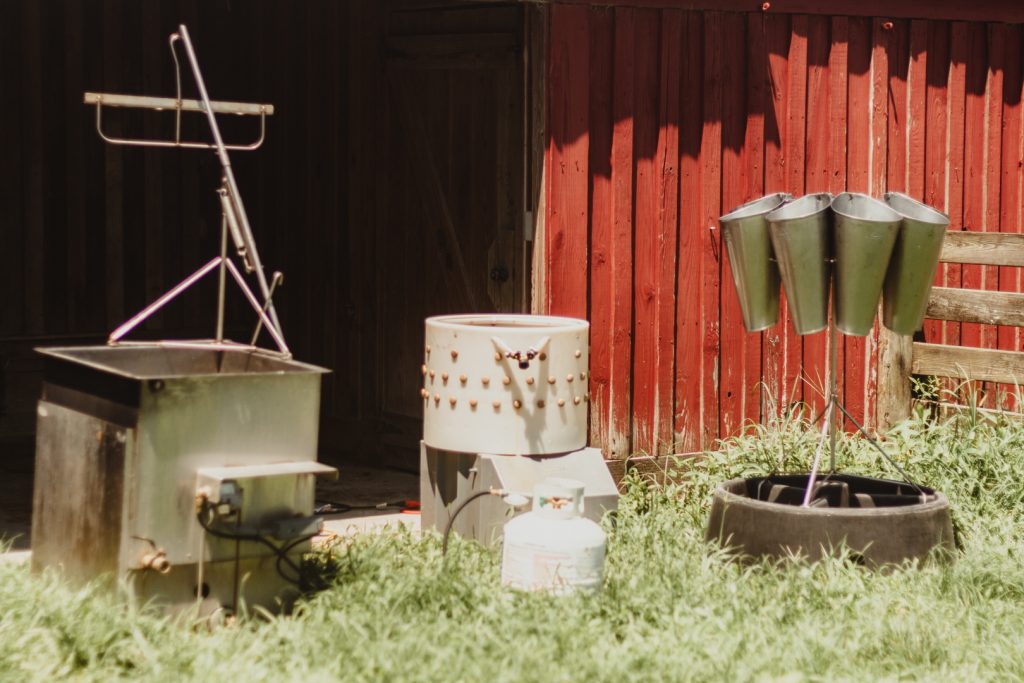
Those are the three big things you’ll want. Are their ways to do it without all that? Yes, but I am not interested in hand plucking 15 birds. So we will move on assuming you are like me
There are a few options for attaining this equipment but I’ll save the best one for last.
First, you could purchase new equipment online. This will cost a couple of thousand dollars.
Second you can keep an eye on facebook marketplace in rural areas around you and pick some or all of the equipment mentioned above.
Now if you plan to slaughter alot of birds, on a very consistent and frequent basis- maybe owning equipment makes sense. If not, the third option I think is best.
Third option is renting the equipment. Many counties in rural areas actually have this equipment available to be rented by the day. In many cases you don’t even need to live in that county as long as you are near by. So don’t get discouraged if yours doesn’t, reach out to the agricultural offices of neighboring counties as well.
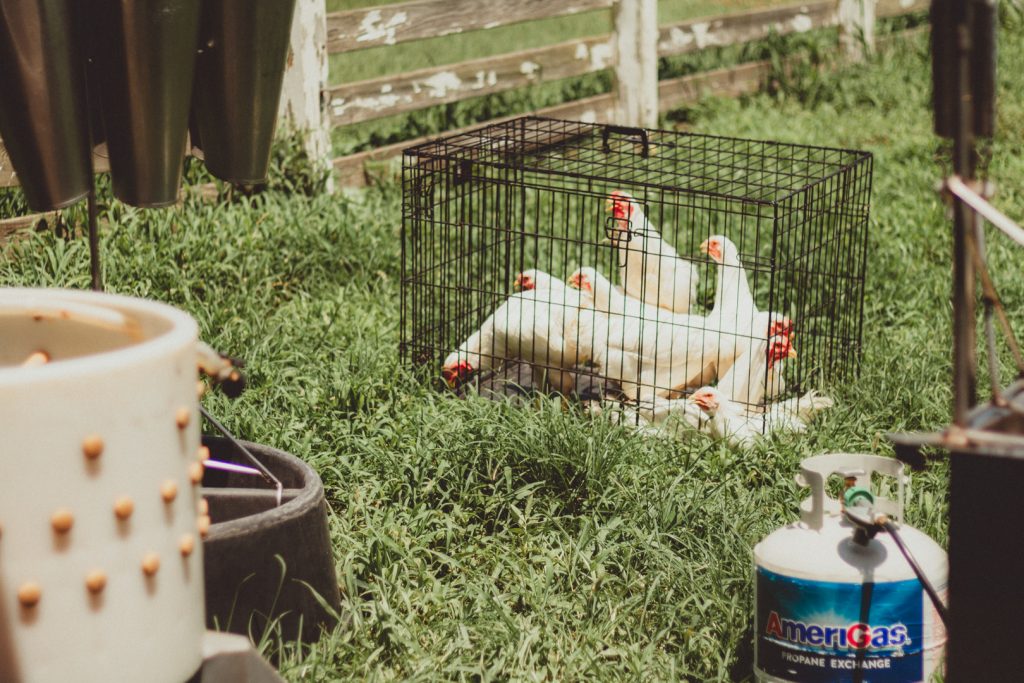
We rented our equipment for $35 for the weekend and processed 15 birds.
4 steps to processing chickens
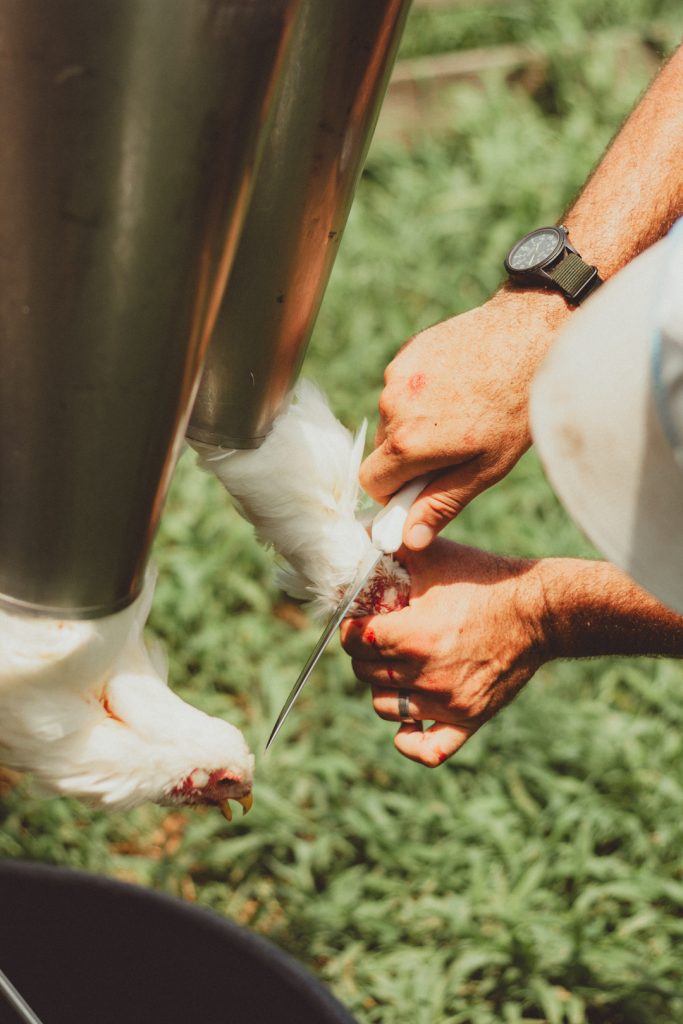
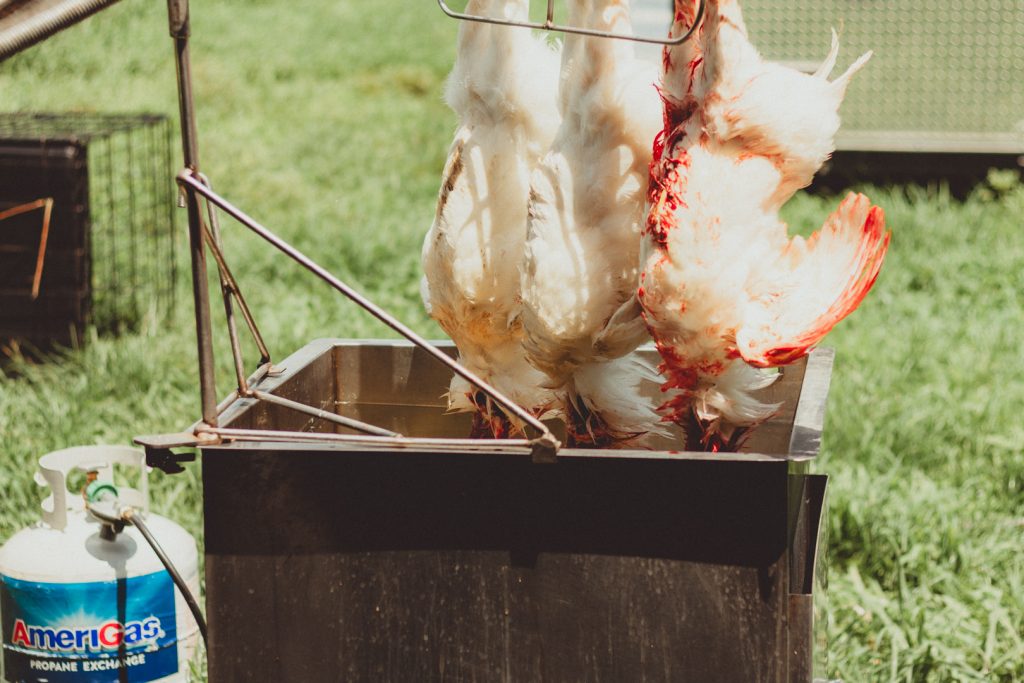
Step One – Killing Cone
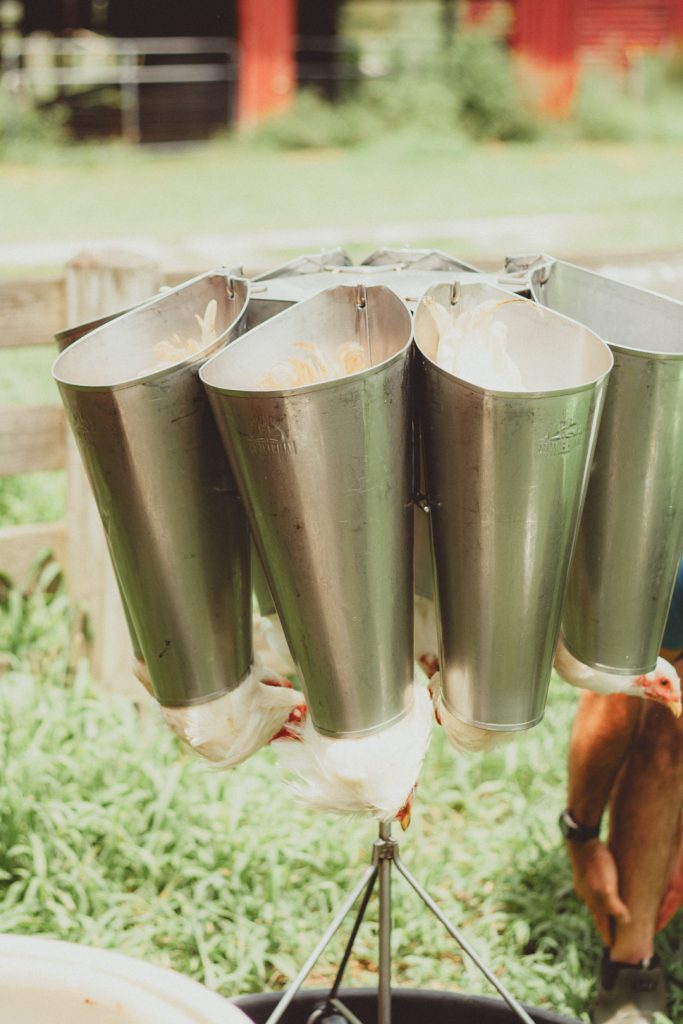
Once you have set everything up and gathered your birds you are ready to get started. The first step is placing them upside down in the cones and slicing their throats. They did not want to be put in the cones but then once they were in they were quite peaceful. They didn’t make a lot of noise, they didn’t move, they just kind of sat their and awaited their fate.
At this point you just kind of wait. As you can see below the cones are attached to a base that is designed to collect all of the blood from chickens bleeding out.
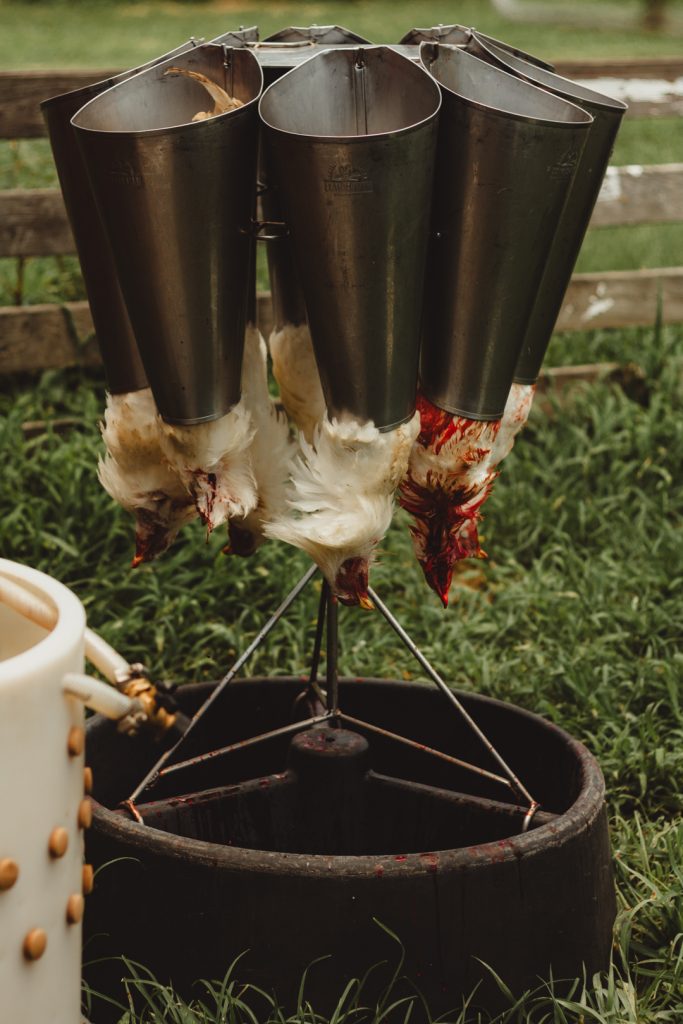
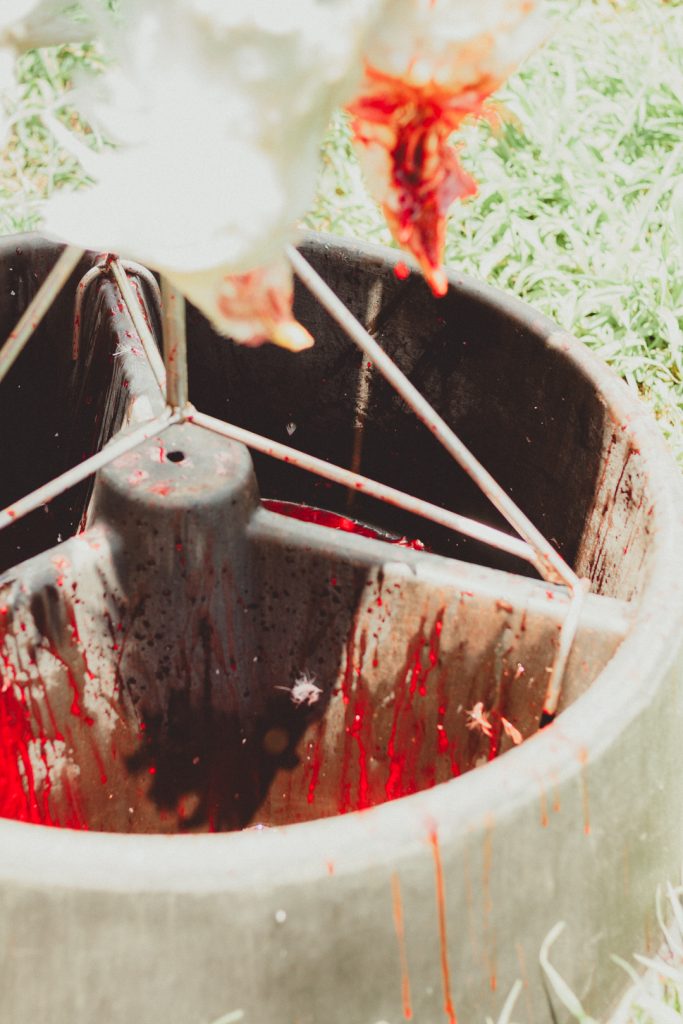
Here comes some honesty about the process. I was fine with most of this. I know they lived good lives, this was their purpose, I was good. However, because we raised them organically they were on the smaller side. You can see in the picture on the left how far down the birds are hanging out of the cone. While dying there is a decent amount of twitching. Several of the birds twitched so much that they actually fell out of the bottom of the cone, into the blood and began flalling and screaming. It was a bit horrifying. The was by far the first part of this entire process. If that hadn’t happened I would say it was so easy *almost* any one could do it. But if you have a weak stomach or are an emotional person I think this could have done you in.
Step Two – Scalding Tank
PRO TIP Make sure you turn this on to heat up several hours before you use it.
The scalder needs to get to 140 degrees. Not thinking about that it is a massive tub of water we didn’t realize it would take so long and we turned it on waaay too late. Luckily for us we had rented the equipment for the weekend because we actually ended up needing to process the next day because it didn’t get hot enough.
To use this you attach the birds by their feet, breast side down, then dunk them in the tank for about 10-15 seconds. Repeat this several times until the feathers easily come out when gently tugged. You want to be careful to not leave the birds in too long as this can actually cook them.
Step Three – Plucking Machine
Could you do it without this? Sure, you could pluck by hand. But seriously, who has time for that.
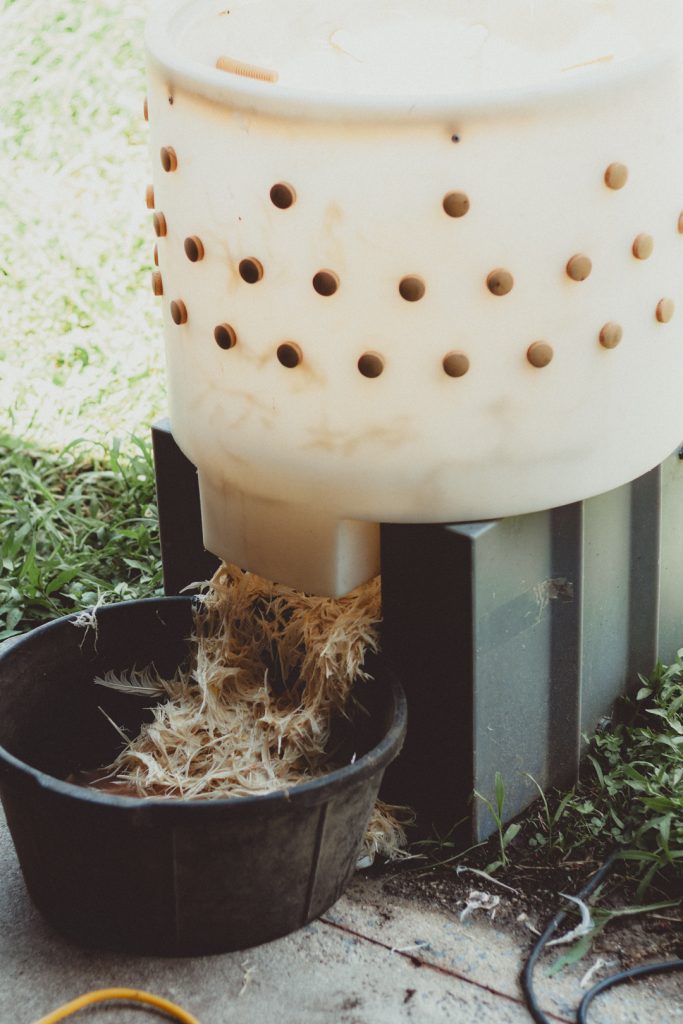
Essentially what you do here is but 2-4 birds turn it on while spraying the birds with water. Inside the basin are rubber fingers that remove the feathers. Pictured above you can see where the machine dumps the feathers.
This machine is not perfect. There will likely be some stubborn feathers that you will still need to pluck by hand. (I won’t lie to you, this part was oddly satisfying). You will want to be careful not to overdo it has you can cause damage to the skin or even rip the wings off.
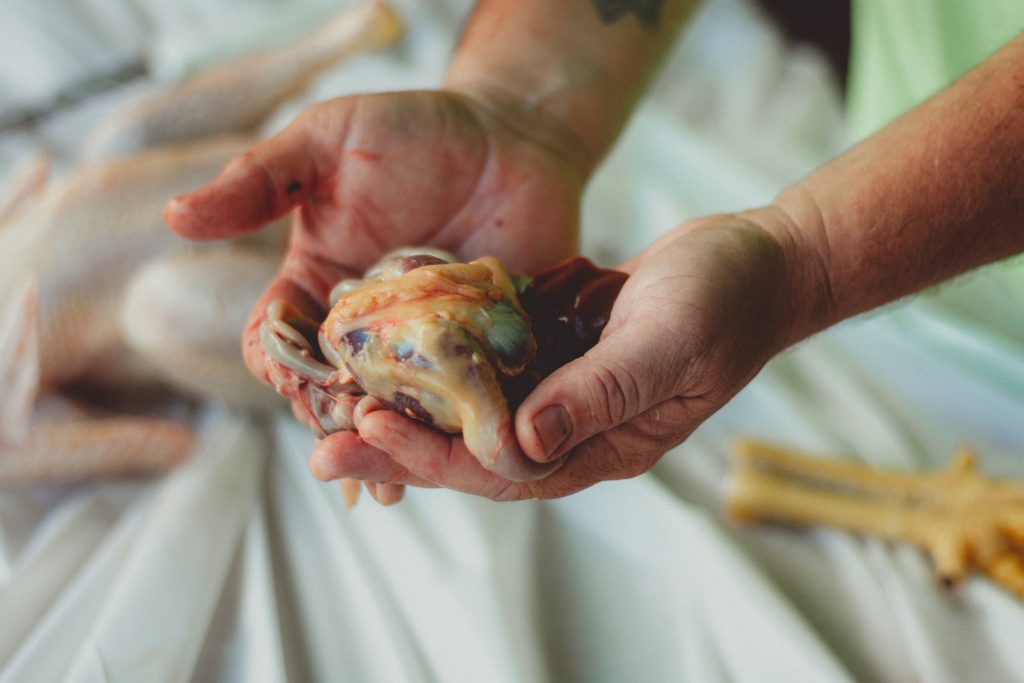
Step Four- Clean and Part
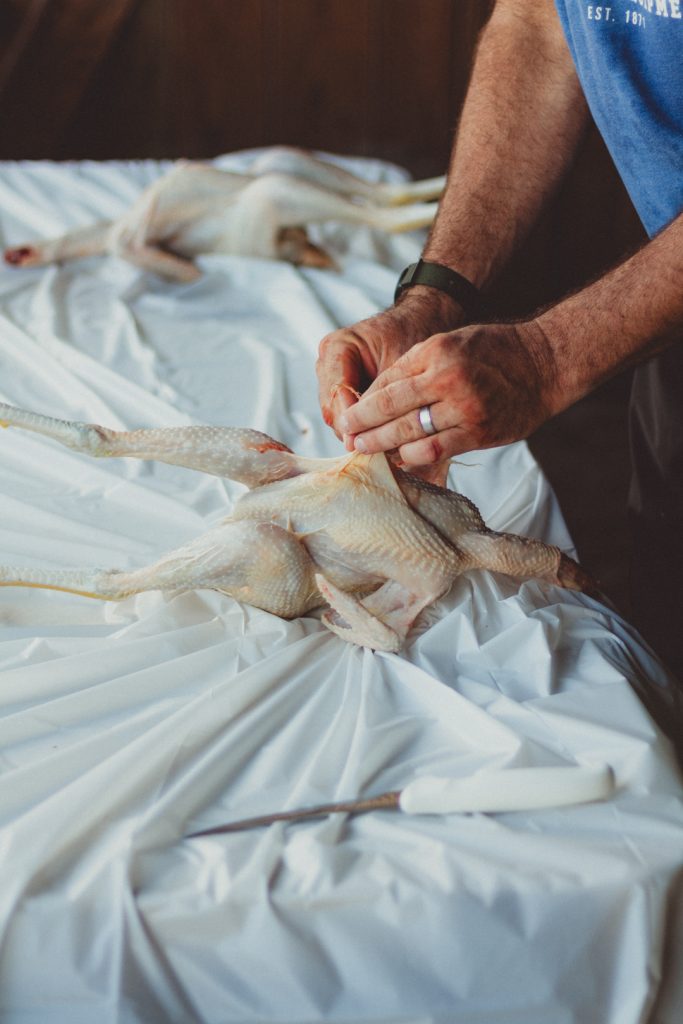
The only thing really required here is a very sharp filet knife. In this process we decided to keep all the birds whole. This time ( due to poor planning) the only additional part we kept were the feet to make broth. Had I really thought it through I would have also kept some of the organ meat as well to use. My goal moving forward would really be to waste as little as possible. The feathers are compostable so it is entirely doable to have virtually no waste throughout this process.
After cleaning the birds get placed immediately into an ice bath over night.
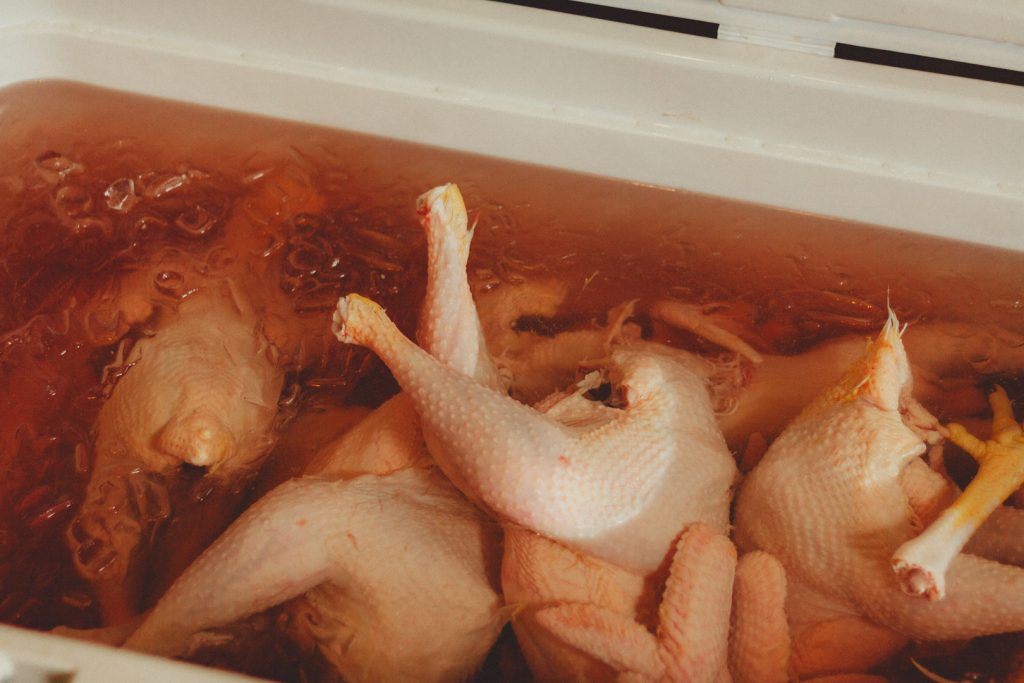
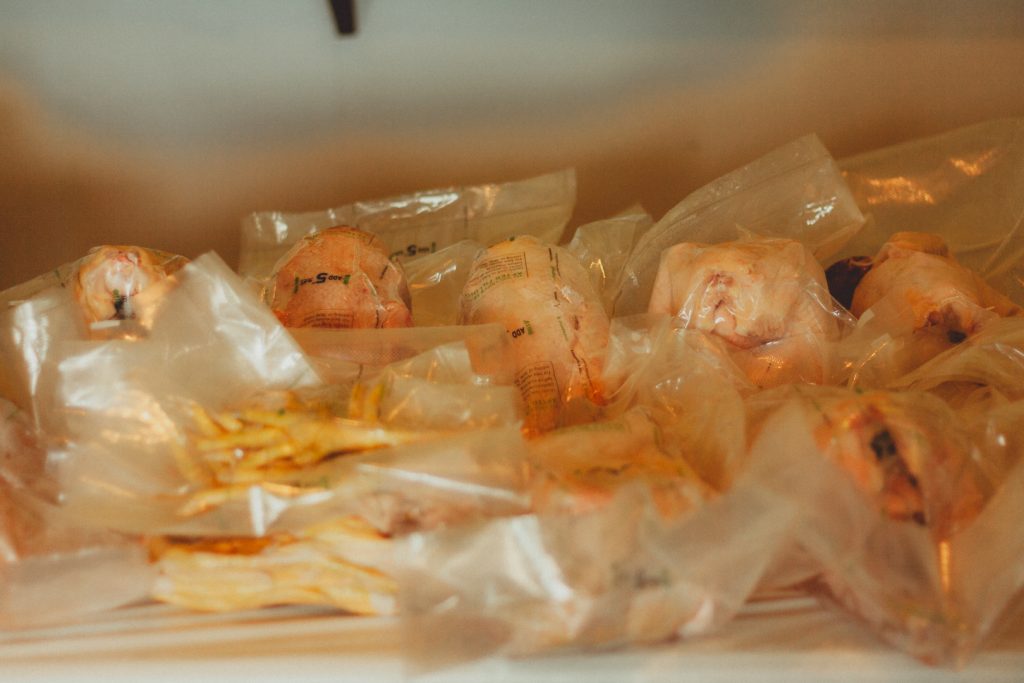
Because we decided to keep the birds whole and not part them out the very last thing we did was vacuum seal them for storage and place them in the freezer. Well, we kept one out to cook that day- it doesn’t get any fresher than that!
All in all I would call this a positive experience. I learned a lot, realized some things I would do differently next time and gained confidence in a new skill.
While we have grown our own food in the past in the form of eggs and vegetables in the garden, raising these birds from chicks, caring for them and then facilitating them in fulfilling their purpose to nourish our family brings a unique sense of pride.
I hope you have enjoyed this post and learning along with us. Be sure to follow us on instagram.